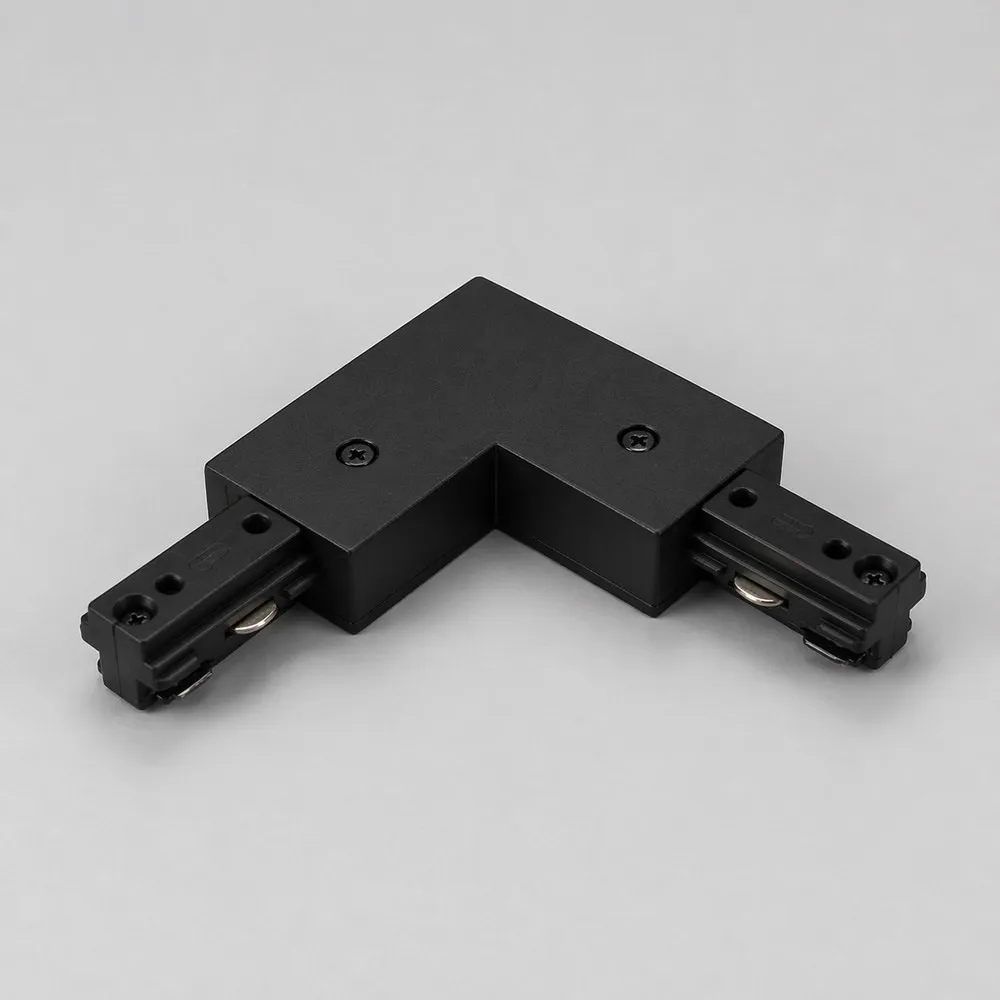
Built for the ASTELLA H-type systemThe AST-TRK-H-LC-BK is a dedicated
L corner connector for the ASTELLA Track System in its H-type, single-circuit version. It is not a universal adapter: it is machined and wired to match the conductor arrangement of this specific track, which is why polarity and grounding are preserved from one leg of the run to the other. The black finish is chosen to match black ASTELLA track sections so the joint reads as a continuous line rather than a visible splice, a detail that matters on exposed ceilings, in boutiques and in open-concept homes where the track is part of the design.
Technical specificationsSKU: AST-TRK-H-LC-BK
Brand: TUROLIGHT
System: ASTELLA Track System
Type: H-type, single circuit
Track layout: 1-way (P + N + PE)
Voltage: 120V, 60HZ, 20A
Protection: Class I, IP20
Finish: Black
Applicable models: AST-TRK
Electrical and installation detailsAlways switch off power at the main source (the panel) before installing track or accessories. For mounting, the track is positioned over the outlet box and the fixing holes are marked on the ceiling or wall; on drywall or plaster, 5/8 holes are drilled and the track is secured with the toggle bolts supplied, while on wood surfaces standard #10 wood screws are used (not supplied). The plain underside of the track faces the ceiling or wall. For the connector itself, the ground tabs must be prepared before sliding it onto the NON-GROUND conductor-side tab of the track section being joined — if the wrong tab has been removed, the connector must not be used, because grounding will no longer be maintained. Loosen the set screws on the connector before sliding it into the open end of the track, then tighten them. Wire connections at live feeds or end feeds are made by cutting and stripping the box wires at 3/8" and securing them to the screw terminals; there is no need to wrap the wire around the screw. Once all track and connectors are installed, slide dead-end caps into every open end and tighten the set screws before turning the power back on.
Fixtures, heads and compatibilityTo mount a lampholder, align the polarity lines of the track with those of the lampholder, push the top of the mounting adapter (with the contact tabs) into the track slot and turn 90°. If the adapter does not turn easily, don't force it — turn the other way. To remove it, press the release lever with your index finger and turn 90°. That quick-twist action is what makes
track light heads so practical: you can add, move or re-aim fixtures as merchandising or furniture changes, without touching the wiring. Only fixture assemblies marked for use with TUROLIGHT track should be installed on this system.
Real projects and documentationThink of a retail floor where the track runs along the display wall then turns toward the cash counter, a café lighting both the counter and the seating nook, a kitchen where the run follows the island and then the backsplash, or a home office and hallway sharing one continuous circuit. In each case the L connector is what makes the 90° turn possible while keeping a single feed. Pair it with black ASTELLA sections such as the
AST Track 4 ft H type 1 circuit black or the
AST Track 6 ft H type 1 circuit black, or with white sections like the
AST Track 8 ft H type 1 circuit white when the ceiling calls for it. The full installation instructions for the AST-TRK track system are available as a technical PDF in the Documentation tab of this page.