What this connector actually does
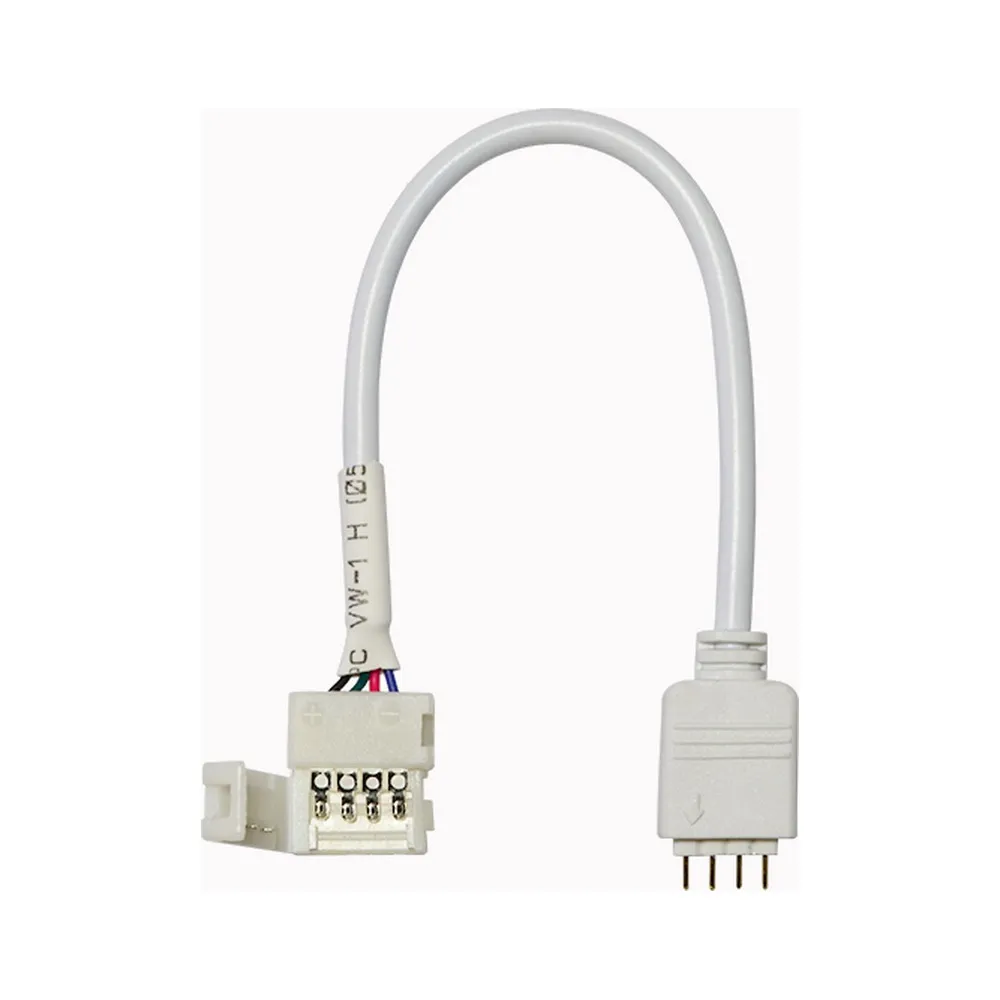
The QCONRGBCTRL is a two-part accessory: a solderless quick connector on one end that clamps directly onto the cut end of an RGB tape light, and a removable 4 pin controller connector on the other end that plugs into the input of an RGB controller. Between them runs a short flexible lead, so you can tuck the controller behind a cabinet, inside a cove or under a counter while the strip stays exactly where you want the light. Because nothing is soldered, the connection can be opened, adjusted and re-clamped if you change the layout later — a real advantage on jobs where the design evolves on site.
Why you need it after a second cut
Every RGB strip arrives with a factory connection at each end. Cut the reel once and you have two pieces, each with one usable end — one spare 4 pin connector is enough to feed the second piece. Cut it again, into three or more sections, and the middle pieces have bare copper pads on both ends and no way to reach the controller. That's precisely the gap this part fills: it converts any freshly cut end into a controller-ready input. The result is less waste, fewer half-reels sitting in the shop, and the freedom to cut your RGB LED strip exactly at the cut marks your layout needs rather than the ones your connectors allow.
Compatibility — read this before you order
This connector is made for 5050 RGB LED strips and cannot be used with 3528 RGB LED strips. The 5050 chip is the larger square diode found on most colour-changing tape; the pad spacing and strip width differ from 3528, so forcing the wrong one gives you a loose, unreliable contact. Check the chip designation printed on your reel or listed on its page, confirm your strip is a 4 pin RGB type (not RGBW, not single-colour, not addressable), and line up the R, G, B and common markings on the strip with the connector before you close the clamp. Working on a clean, dry, flat cut — scissors straight across the copper pads — is the single best thing you can do for a solid connection.
Installation tips that make it last
Cut only on the marked cut lines, then peel back a few millimetres of the adhesive backing so the copper pads sit flat inside the clamp. Insert the strip fully, close the clip, and give the lead a gentle tug to confirm it's seated. Keep the connection out of standing water and away from sharp bends; if the strip is mounted in an aluminum channel, leave a little slack so the lead isn't under tension. On the controller side, the plug simply pushes in — and since it's removable, you can disconnect a zone for service without disturbing the tape itself.
Where it gets used
Think kitchen toe-kicks and under-cabinet runs, cove and tray ceilings, stair nosings, headboards and media walls at home; retail display cases, bar fronts, restaurant soffits, gym accents and trade-show booths on the commercial side. Anywhere a colour-changing run has been trimmed to fit a real-world wall, this quick RGB strip connector brings the leftover piece back to life. Suited to both residential and commercial projects, it's an inexpensive part to keep on hand in multiples — installers rarely regret having one more in the toolbox.