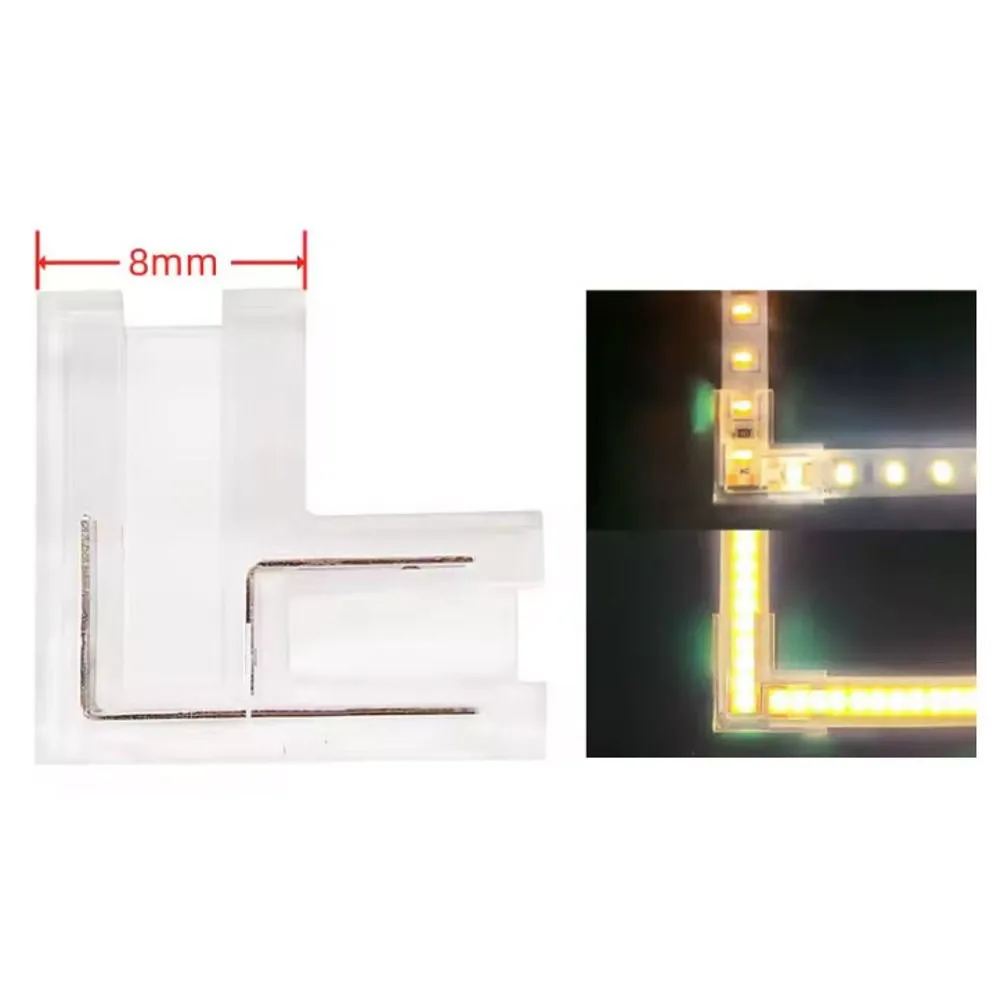
Built for clean cornersThis corner connector exists for one job: turning a run of
COB LED tape at a right angle without cutting power, without a solder joint and without a visible bump. The moulded housing holds the two strip ends at a fixed angle, which keeps the two segments square to each other and keeps the light line continuous around the corner. That matters most with COB tape, where the whole selling point is a smooth, dotless beam — a sloppy corner with a twisted strip or a solder blob ruins the effect instantly. Because the clip is
low profile, it slides into aluminum extrusions and hides behind trim rather than lifting the diffuser.
Solderless clamp connectionInside the housing, spring contacts press directly on the copper pads of the tape. You open the clamp, slide the cut end of the strip in until the pads sit under the contacts, and close it. The connection is made in seconds, with
no soldering iron and no heat near the LEDs or the adhesive backing. It is equally friendly to a first-time DIYer and to an electrician working overhead on a ladder. The clamp is also reversible: if the layout shifts, release it, reposition the tape and close it again. That makes it a favourite during mock-ups, when the final corner position is still up for debate.
Technical specificationsSKU: LCCON-CLIPCOB-L-8MM
Type: L-shape corner connector, clamp style, solderless
Contacts: 2-pin
Strip width: 8 mm
Compatible tape: single-colour COB LED strip, 2-pin
Connection: direct clamp on the copper contact pads
Reusable: yes, can be released and repositioned
Installation and good habitsCut the
LED strip only on the printed cut lines — cutting between them leaves a dead segment. Wipe the contact pads with a dry cloth so dust, adhesive residue or fingerprints do not sit between the copper and the contacts. Check the polarity markings on both pieces before closing the clamp: the plus side of one segment must face the plus side of the connector. Then energize the section and confirm both legs light up before you peel the adhesive backing or install the channel cover. Testing first saves a lot of rework on a long cove or a full perimeter. Keep the connector inside the channel where possible, and avoid pulling on the tape at the joint — the clamp holds the pads, not the weight of a whole run.
Where it earns its keep, and what it works withKitchen under-cabinet runs that wrap an L-shaped counter, toe-kick lighting around an island,
cove lighting that follows a full ceiling perimeter, stair nosings, closet shelving, display cases, retail signage and workbench task lighting — anywhere the strip has to change direction cleanly. It fits residential renovations as easily as light-commercial fit-outs. For straight in-line joins along the same run, use the
straight COB connector 2-pin 8mm; when the corner is wide, rounded or has an obstacle in the way, the
L-shape COB connector with wire cable gives you flexible slack between the two sections. To land the run on a driver, the
green male connector for power supply and the
green female connector for power supply finish the job. No documentation is listed for this accessory — the details above cover what you need to install it.