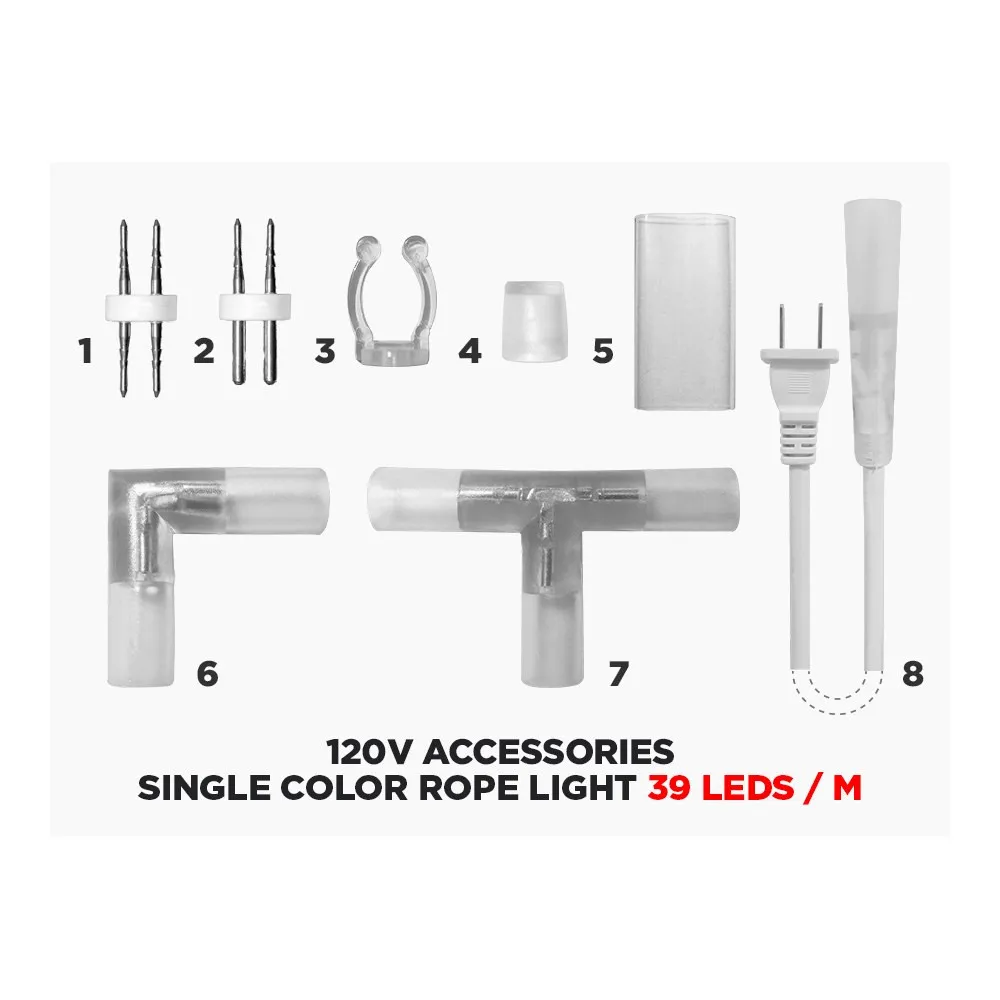
What's in the accessory line
LED Montreal offers a variety of 120V LED rope light accessories and connectors so you can customize your project instead of adapting your project to the product. The range is built around the Rope-to-Rope Two Pin Connector and the matching heat shrink tube, the two pieces you need to splice, extend and seal a 39 LEDs/m rope light run. Because 120V rope light is sold in long reels, most installations come down to two questions: where do I cut, and how do I make the joint safe and invisible? These accessories answer both.
Joining two rope lights, step by step
The Rope-to-Rope Two Pin Connector permits you to join two 25 m rope lights together, so you may reach a length of up to 50 m. Start by cutting the end of the 120V LED rope light at a designated cut point to expose the rope's connections. Slide the heat shrink tube into place on one end of the rope before you make the connection — it's the step everyone forgets and then has to redo. Insert the two pin connector into the first rope, then bring the second rope onto the other side of the connector. Warning: you will notice the connector is not perfectly aligned with the centre of the rope light. This is intentionally conceived so that you respect the rope's polarity. Join the second end while respecting that polarity, slide the shrink tube over the completed connection, and apply heat until the tube shrinks tight and completely seals the joint.
Why polarity and sealing matter
On a 120V LED rope light, polarity is what keeps the whole downstream section lit. Force the connector in backwards and the second rope simply won't light — or will light erratically — which is why the off-centre pin arrangement exists. The heat shrink tube is just as important: it locks the connector mechanically so the joint can't be pulled apart, and it seals the splice against dust and moisture ingress. Take your time with the heat, work the tube evenly from the middle outward, and let it cool before you handle or mount the rope. A properly shrunk splice should look like a slightly thicker section of rope, with no gap at either end.
Where these connectors earn their keep
Think of any run longer than a single reel or any layout with corners, breaks and returns. Deck and balcony railings, pergolas and gazebos, garden paths and fence lines, storefront windows and awnings, restaurant and bar perimeters, staircases and handrails, cove lighting above cabinets and crown moulding, trade show booths, arenas, garages and workshops. On commercial buildings where a single façade can eat an entire reel, being able to splice a second rope on site — rather than re-planning the layout — saves an afternoon. These accessories are equally at home on residential and commercial projects, and they keep a long LED strip lighting run looking like one continuous line of light.
Documentation and ordering
Product reference: SKU RPLACC, from LED Montreal, listed under our 120V LED strips category. No additional documentation is posted for this item; the assembly instructions above are the full installation procedure. When you plan your order, count one connector and the matching shrink tubes for every splice in your layout, and add a spare — offcuts and last-minute layout changes happen on every job site. If you're unsure how many joints your run will need, sketch the perimeter, divide by your reel length, and order accordingly.