Nov 06, 2026 / By the Lumibox team / in LED Guides
Installing pot lights comes down to five jobs: plan the layout, cut clean holes, bring power to a junction box, connect each fixture, and test before you close up. Modern slim LED recessed lighting makes most of that work far lighter than with old housings, but it is still electrical work, and in Quebec a licensed master electrician is generally the person who should run new circuits and sign off on the job.
This guide walks through the real sequence on site: tools, cutting, wiring, junction boxes, safety and the point where you should call a pro. If you are still deciding how many fixtures you need and how far apart they go, start with our guide How Many Pot Lights Do I Need? Spacing, Layout and 4 in vs 6 in, then come back here for the installation itself.
The installation method depends on the fixture. Two families of recessed lighting cover almost every residential project.
A slim pot light is a thin LED disc with a small remote driver or junction box on a short cable. It clips into a round hole with spring arms and needs no metal can. This is the go-to choice for renovations, finished basements and any ceiling where you only have access from below. The ORTECH 4 in slim disc LED fixture is a typical example: 10 W, 900 lm, CRI 90, five selectable colour temperatures, FT6 cable, Energy Star rated, packed six modules and six drivers to a box.
New construction often uses a frame or housing nailed or screwed to the joists before the drywall goes up. Browse recessed housings when you want a fixed frame, or a gimbal when you want to aim the light. The CANOLIGHT 4 in recessed LED gimbal runs on 90-130 V AC, is IC-rated and wet location rated, delivers 950 lm at 9 W with a 40° beam, CRI 85+, 5CCT, is dimmable and uses FT4 wire. Its cut-out is 105 to 114 mm, so read that number before you choose a hole saw.
Smaller apertures give a discreet, modern look and suit kitchens, hallways and bathrooms; larger ones throw more light per fixture and fit living rooms or commercial spaces. Compare the 3-4 inch LED downlights and the 5-6 inch LED downlights, and buy every fixture in the room from the same series so trims and colour match.
| Item | What it is for |
|---|---|
| Stud finder and a flashlight | Locate joists, pipes and ducts before cutting |
| Hole saw or adjustable circle cutter | Clean, round cut-out matching the fixture template |
| Drywall saw and dust shroud | Corrections and less dust in the room |
| Fish tape or glow rods | Pulling cable between holes across the joists |
| Voltage tester (non-contact) | Confirm the circuit is dead before touching wires |
| Wire stripper and connectors | Splices inside the junction box |
| Cable approved for the job | The gauge and type your electrician or the code specifies |
| Mounting plates or frames | Exact hole position in new construction |
| Safety glasses, dust mask, stable ladder | Overhead cutting is dusty and tiring |
For new builds, a mounting plate saves time and gives perfectly aligned holes. The LUMENSTARLED 4 in rough-in mounting plate is made for its 5 CCT slim downlights, and the ORTECH 26 in premounting plate with lip spans the joists and holds the position until the drywall is up.
Every connection must live inside an approved enclosure. With slim pot lights, that enclosure is the small junction box attached to the driver, which is why these fixtures can go into a ceiling without a separate box. With a classic housing, the box is built into the frame. Either way, never leave a splice loose in the ceiling cavity.
Most residential pot lights are wired in a chain: power arrives at the first fixture's box and continues to the next one. Keep the box covers closed, respect the number of conductors the box is designed for, and clamp each cable where it enters. If you are replacing an existing ceiling light, the old box usually stays as a junction point; our electrical boxes cover that case, from octagonal boxes to covers and plates.
Low-voltage downlights are different. The LUMENSTARLED 4 in slim recessed LED panel downlight runs on 12V DC, and the CANOLIGHT mini LED spotlight on 24V DC with a 44 mm cut-out. These need a matching LED driver or power supply, not a direct line connection.
A dimmable pot light still needs a compatible LED dimmer to avoid flicker, buzz or a poor low end. Check the fixture's dimming method and the dimmer's LED load rating. Our LED dimmer switch guide explains TRIAC, ELV and 0-10 V, and the LED dimmers category lists the controls.
If the fixture will touch insulation, as it will under an attic, it must be IC-rated. Most slim LED pot lights are, but confirm on the product page or the label rather than assuming.
A top-floor ceiling usually has a vapour barrier and insulation above it. Every hole you cut is a potential air leak, which can bring moisture into the attic. Ask your electrician how to keep the barrier continuous, for example with an airtight fixture or a sealed box designed for that ceiling, and check what your municipality expects.
Cutting drywall and pushing a fixture into place are tasks many homeowners can handle. The electrical part is another matter. In Quebec, electrical work in a home is generally reserved for licensed master electricians, and insurers may ask who did it after an incident. Call one when:
Codes and certifications (CSA, cUL) change from one jurisdiction to the next, so always confirm with a master electrician or your municipality before you start.
You can plan, mark and cut, but the wiring is electrical work. In Quebec it is generally reserved for licensed master electricians. A common approach is to prepare the layout and buy the fixtures, then have an electrician do the connections.
Yes, every connection needs one. Slim LED pot lights come with their own small junction box on the driver, so no separate box is needed at each light. Housings have the box built in.
Choose slim canless fixtures, cut from below with the template, and fish the cable across the joists from hole to hole. No attic access is needed in most cases.
The usual method is a chain: the switch feeds the first fixture's junction box, which feeds the next, and so on. The number of fixtures per circuit depends on the circuit load; your electrician will confirm it.
The IC rating only means the fixture can touch insulation. Under an attic, the vapour barrier must still stay continuous, so use an airtight fixture or a sealed box and ask your electrician.
Yes, with the right rating. Above a shower, pick a fixture rated for wet locations, such as the CANOLIGHT 4 in gimbal; elsewhere in the bathroom, a damp location rating is the usual choice. Confirm with your electrician.
Ready to plan your project? Compare slim fixtures, gimbals and trims in our recessed lighting collection, and for the background on terms, read Pot Lights vs Recessed Lights.
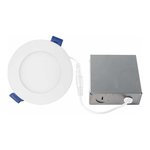 RECESSED LIGHT LED 4 IN 11W 3000K AIRTIGHT CERTIFIED WET LOCATION MATTE WHITE
 6" RETROFIT RECESSED LED DOWNLIGHT, 15W, 1000LMN, 5CCT (2700K,3000K,3500K,4000K,5000K) WHI...
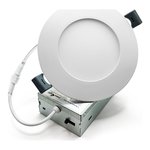 4 INCHES SMD DOWNLIGHT 9W - 90-130 V AC - IP20 - UP TO 800LM - CRI 85+ - 5CCT - 120° - WHI...
 RECESSED MOUNTED LED ALUMINUM 3000*21.7*5.7MM
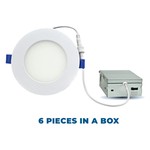 4" SLIM DISC LED FIXTURE. 5CCT (2700/3000/3500/4000/5000K) , 10WATTS, 900LMN, CRI 90, FT6...
 3.5 INCHES RECESSED LED GIMBAL MULTI DIRECTION 8W - 90-130 V AC - WET LOCATION IC-RATED -...
 PICO LED OUTDOOR SPOTLIGHT - 3000K - LCAP-PICO12-24V3W-3000K
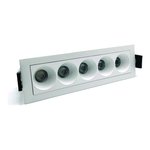 LED RECESSED LINEAR BLADE LIGHT 5 HEADS - 120VAC - 10W - 38 DEG - 600 LM - CRI90 - PF0.9 -...