Nov 06, 2026 / By the Lumibox team / in LED Guides
Can IC rated pot lights touch insulation? Yes: that is exactly what the rating means. IC stands for insulation contact, and an IC rated pot light or housing is designed to be buried in insulation. A non-IC fixture is not. It needs an open space around it, free of insulation, and should only go in a ceiling where nothing will ever be packed against it.
That short answer covers most jobs, but a Canadian ceiling raises other questions: the attic above, the vapour barrier, air leaks, and the slim LED pot lights that need no housing at all. This guide explains each one so you can pick the right fixture before the drywall goes up. When you are ready, compare the options in our recessed lighting collection.
Every recessed fixture produces some heat. The rating tells you how the manufacturer tested it against the materials around it.
If you are not sure what is above the ceiling, or if insulation could be added one day, choose IC. It removes the clearance question entirely.
| Ceiling situation | What to choose | Why |
|---|---|---|
| Below an insulated attic | IC rated and airtight fixture, with the vapour barrier kept continuous | Insulation will touch the fixture, and warm, moist air must not leak into the attic |
| Between two heated floors | IC or non-IC; IC still simplest | There is usually no insulation, but sound insulation or future work can change that |
| Cathedral or sloped ceiling | IC rated, airtight, low profile | The cavity is shallow and full of insulation |
| Basement ceiling | Slim LED pot light or IC housing | Joists, ducts and pipes leave little depth; insulation is often added for sound |
| Bathroom, covered porch or soffit | IC rated plus damp or wet location rating | Moisture and cold air both reach the fixture |
| Existing housing being upgraded | Retrofit LED module made for that housing size | The housing rating stays; the module replaces the old lamp |
A non-IC housing relies on the air around it to stay cool. If insulation is pushed against it, heat builds up. Many older non-IC cans include a thermal protector that switches the light off when it gets too hot, then back on once it cools. If your old pot lights blink off after a while, trapped heat is a likely cause.
The clearance itself is set by the manufacturer and by the electrical rules that apply where you live. It is printed in the installation instructions and on the label inside the housing. We do not give a universal number here because it changes from one product to the next. Read the label, keep the space free of insulation, and never build a box of insulation tightly around a non-IC can.
In practice, most renovators skip the problem by choosing IC rated products from the start. Our recessed housings category lists housings with their ratings, so you can check IC and airtight before you buy.
A classic pot light has two parts: a metal housing (the "can") fixed between the joists, and a trim or LED module that goes inside. The housing carries the ratings: IC or non-IC, airtight or not. When you replace only the module, the housing's ratings still apply.
A retrofit module is the quick upgrade for an existing can. The ORTECH 4 inch retrofit downlight delivers 10W and 800 lumens with 5CCT selection from 2700K to 5000K, and the 6 inch version delivers 15W and 1000 lumens. Both install directly into an existing housing, so the ceiling stays intact.
Slim LED pot lights sit in a round cut-out with spring clips, and their driver sits in a small junction box beside them. There is no can to rate, so the fixture itself carries the IC rating. That is why slim lights are so popular in basements and in renovations with shallow joists.
The LUMENSTARLED 4 inch thin ceiling panel light is a good example: 120V AC, 9W, CCT selectable between 3K, 4K and 5K, dimmable, IC rated and ETL approved. Its 6 inch sibling runs at 14W with the same 3K/4K/5K selection. For a minimal look, the ORTECH 2 inch slim trimless downlight offers 8W, 600 lumens, dimming and 5CCT selection in black.
An adjustable gimbal lets you aim the beam at a wall, a counter or artwork. The CANOLIGHT 4 inch recessed LED gimbal is rated for wet locations and IC rated, with 9W, 950 lumens, a 40° beam, CRI 85+, 5CCT, dimming and FT4 wire, for a cut-out of 105 to 114 mm. The 3.5 inch model gives 8W and 830 lumens with the same IC and wet location ratings. Browse more sizes in 3-4 inch downlights and 5-6 inch downlights.
In a cold climate, the vapour barrier on the warm side of the ceiling keeps indoor moisture out of the insulation. Every hole you cut for a pot light is a break in that barrier. Warm, moist air that escapes into a cold attic can condense on the framing and the insulation, and it also wastes heat.
There are two ways to deal with it:
Whatever you choose, seal the joint between the barrier and the fixture or box with compatible tape or sealant. A good fixture with a torn barrier around it still leaks.
For a fixture sold in Canada, look for a recognized certification mark for the Canadian market, such as CSA, cUL or cETL. The label also states the IC or non-IC rating, the airtight claim if any, and whether the fixture is approved for damp or wet locations.
The building code and electrical code set the rules for insulation, vapour barriers and recessed fixtures, and they change over time and from one province to the next. We present them here only as general markers. Before you close the ceiling, confirm the requirements with a master electrician or your municipality.
Two more points matter for dimming and moisture. If you want to dim your pot lights, make sure each fixture is marked dimmable and pair it with a compatible LED dimmer. In bathrooms and on covered porches, add a damp or wet location rating to the IC rating; our new construction lighting plan walks through these choices room by room.
Yes. An IC rated pot light is tested to be in direct contact with insulation. Lay the insulation over and around it as the instructions describe, without crushing the junction box or wiring.
Heat builds up around the housing. At best, a thermal protector turns the light off repeatedly; at worst, nearby materials overheat. Remove the insulation to restore the required clearance, or replace the fixture with an IC rated one.
In a ceiling below a cold attic, yes: the vapour barrier must stay continuous. Use an airtight fixture, a vapour barrier box such as the one made for 6 inch slim lights, or both, and seal the joints with tape.
Many are, but not all. Because slim lights have no housing, the rating must be on the fixture itself. The LUMENSTARLED 4 and 6 inch thin panel lights, for example, are marked IC rated.
No. IC is about contact with insulation; airtight is about air leakage through the fixture. For a ceiling below an attic, look for both on the label.
Yes, if the module is made for that housing size, but the housing keeps its non-IC rating and its clearance. The LED module produces less heat than an old lamp, yet it does not turn a non-IC can into an IC one.
Start with the ceiling, then the fixture: IC for insulation, airtight for a cold space above, a continuous vapour barrier, and the right size for your joists. Not sure about the terms? Our pot lights vs recessed lights guide explains them. Then browse our recessed lighting, recessed housings and ceiling housing trims to complete your project.
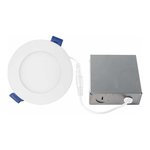 RECESSED LIGHT LED 4 IN 11W 3000K AIRTIGHT CERTIFIED WET LOCATION MATTE WHITE
 6" RETROFIT RECESSED LED DOWNLIGHT, 15W, 1000LMN, 5CCT (2700K,3000K,3500K,4000K,5000K) WHI...
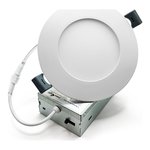 4 INCHES SMD DOWNLIGHT 9W - 90-130 V AC - IP20 - UP TO 800LM - CRI 85+ - 5CCT - 120° - WHI...
 RECESSED MOUNTED LED ALUMINUM 3000*21.7*5.7MM
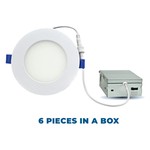 4" SLIM DISC LED FIXTURE. 5CCT (2700/3000/3500/4000/5000K) , 10WATTS, 900LMN, CRI 90, FT6...
 3.5 INCHES RECESSED LED GIMBAL MULTI DIRECTION 8W - 90-130 V AC - WET LOCATION IC-RATED -...
 PICO LED OUTDOOR SPOTLIGHT - 3000K - LCAP-PICO12-24V3W-3000K
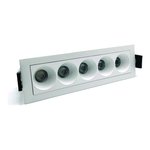 LED RECESSED LINEAR BLADE LIGHT 5 HEADS - 120VAC - 10W - 38 DEG - 600 LM - CRI90 - PF0.9 -...